

[Index | Art | Poetry | Writing | Books and Authors | Help!! | About Me! | Rings | LOTR]
|
Quick Links:
1. New Image 2. Select Color 3. Layers 4. Text 5. Drop Shadow 6. Decrease Color 7. Save |
| In this lessson, I will help you create a banner which you can use for both the GeoGuide (Member Banner Exchange) as well as Link Exchange Deluxe. You'll be learning to work with the Color Palette, Fill Tool, Text Tool, Layers and Color menu. The end result will be a banner with a solid color background, title text with drop shadows, and sub text (shown at the top of these pages). | |
| 1. Opening a New Image | |
|
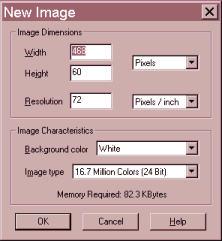
Begin by opening a new image by clicking the New icon For Image Characteristics, you can begin with Background color: White. [However, you can choose any basic color and then skip to part 3 below if you prefer.] For Image Type, select "16.7 Million Colors (24 bit)". |
| 2. Selecting a Background Color | |
|
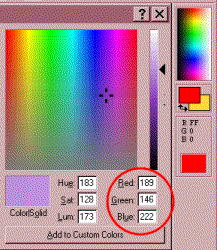
Select a background color from the Color Palette. To choose a specific color, click on the background color to bring up the dialog box shown at left.

The red circle is where you can specify an exact color in the RGB (Red, Green, Blue) format. |
|
*Note that hexidecimal color codes must be converted to RGB values. You can do this easily with your Windows Calculator: open the calculator (Start/Programs/Accessories/Calculator) then click "View" and select "Scientific". Select "Hex" from the radio buttons on the left. Enter the first pair of hex numbers using the right-side buttons. If your color is 33FF99, you would first enter "33". Then just select the "Dec" radio button and it converts the hex number to decimal - "33" becomes "51"
If you are using color words instead of a hex color code, then you should just choose a color which visually matches what you want. Or you could take a screen shot of your page (load your page into your browser and then hit the "Print Scrn SysRq" key at the top of your keyboard. Open PSP and select "Edit/Paste as New Image") and use the Dropper tool |
|
|
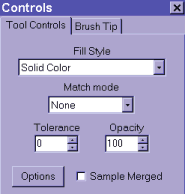
Select the Flood Fill tool |
| 3. Working in Layers | |
|
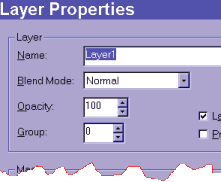
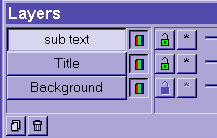
From the Layers palette, click the New Layer icon |
|
Next, create another layer and name it "sub text". You can work on any layer by selecting it from the Layers palette. |
| The Next Page deals with adding text and effects to the layers. | |
|
And also:
This page last updated: October 20, 2002 |
|